")
This how to will show you how to block internet access for a user, users or computer within an Active Directory Group Policy Object. I’ve tested this on Windows 7 and Windows 10 and it works great!
There are plenty of tutorials out there detailing a way to block access is via enforcing a non-existent proxy. This method will work for some things, but the problem is not all software necessarily uses these settings to connect to the internet and doesn’t necessarily stop a determined user or bad guy.
Update 1 Feb 2019 – Thanks to Lou and Peter for pointing out the errors in the post which could conflict with DHCP operation. Thank you both!
This tutorial suggests using Windows Firewall managed through Active Directory to block all internet IP addresses in additional to enforcing a non-existent proxy. These technologies come inbuilt with Windows.
If we didn’t do both then a proxy could exist on your network in the private IP ranges (which are allowed) and therefore have internet activity. You can apply this group policy to individual users or whole OUs as you see fit and will work well across all devices.
Be wary though with Windows Firewall the order of rules doesn’t really matter, Block actions will take priority over Allow rules. Hence why we are blocking all the non-private IP ranges, in other words we are blocking the entireity of IP addresses on the wider internet and not even specifying the private RFC 1918 and RFC 5735 ranges.
The Brief Version
Create a Windows Firewall policy and specify these IP address ranges in a BLOCK rule:
0.0.0.1 – 9.255.255.255
11.0.0.0 – 126.255.255.255
128.0.0.0 – 169.253.255.255
169.255.0.0 – 172.15.255.255
172.32.0.0 – 192.167.255.255
192.169.0.0 – 198.17.255.255
198.20.0.0 – 255.255.255.254
And create a non-existent proxy too for good measure and stop users from changing this setting.
Windows Firewall GPO
Edit your Group Policy as you usually would, and pick a pertinent OU to apply your new policy:

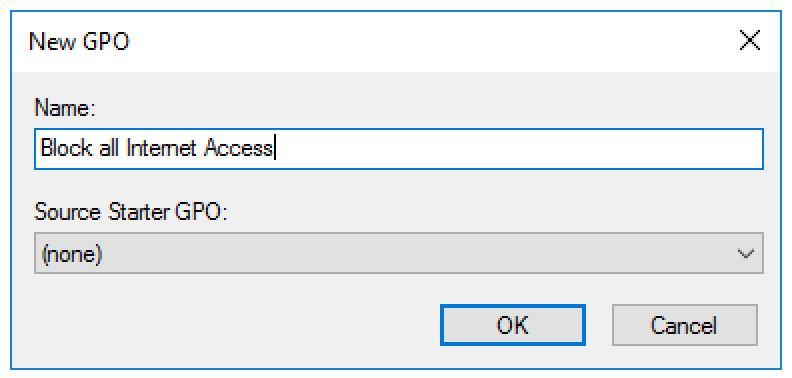
Give it a sensible name and click ok:
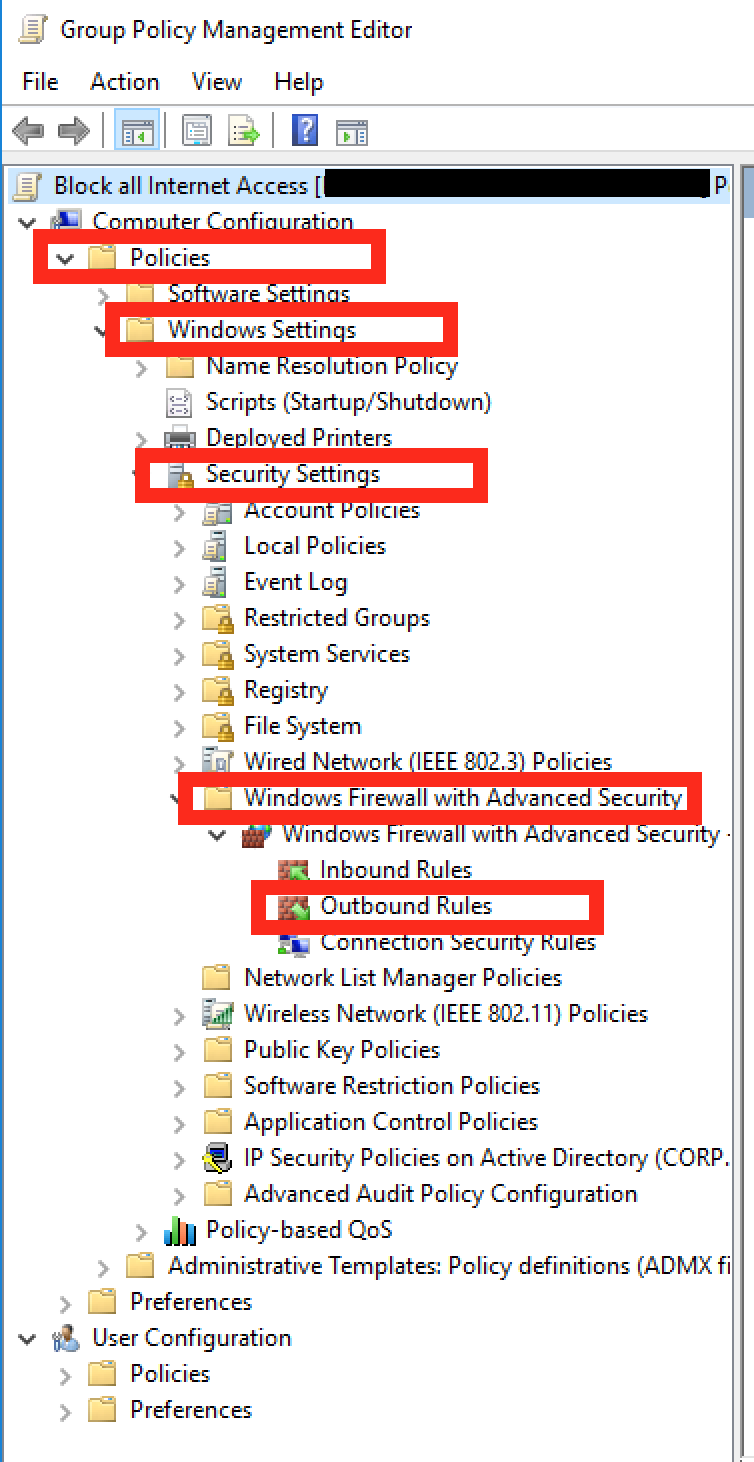
And then in the screen to the right edit the GPO you’ve just created:

Next navigate to Policies – Windows Settings – Security Settings – Windows Firewall with Advanced Security – Outbound Rules:
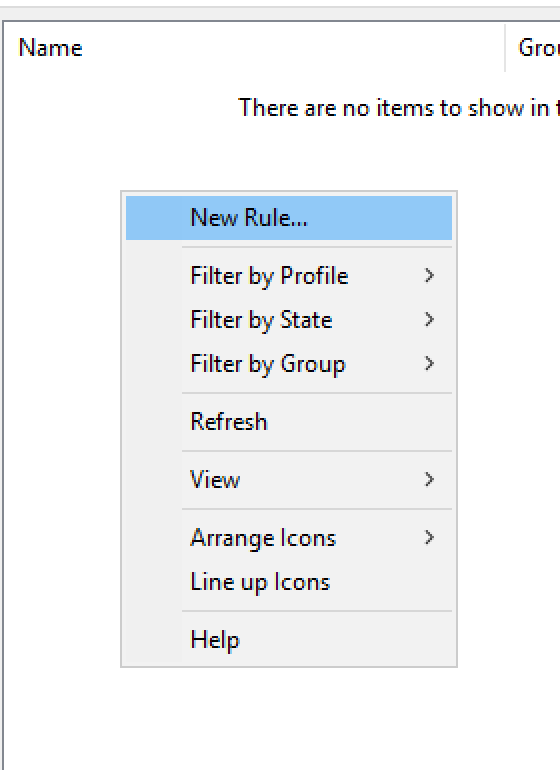
On the panel on the right, right click and select “New Rule…”:
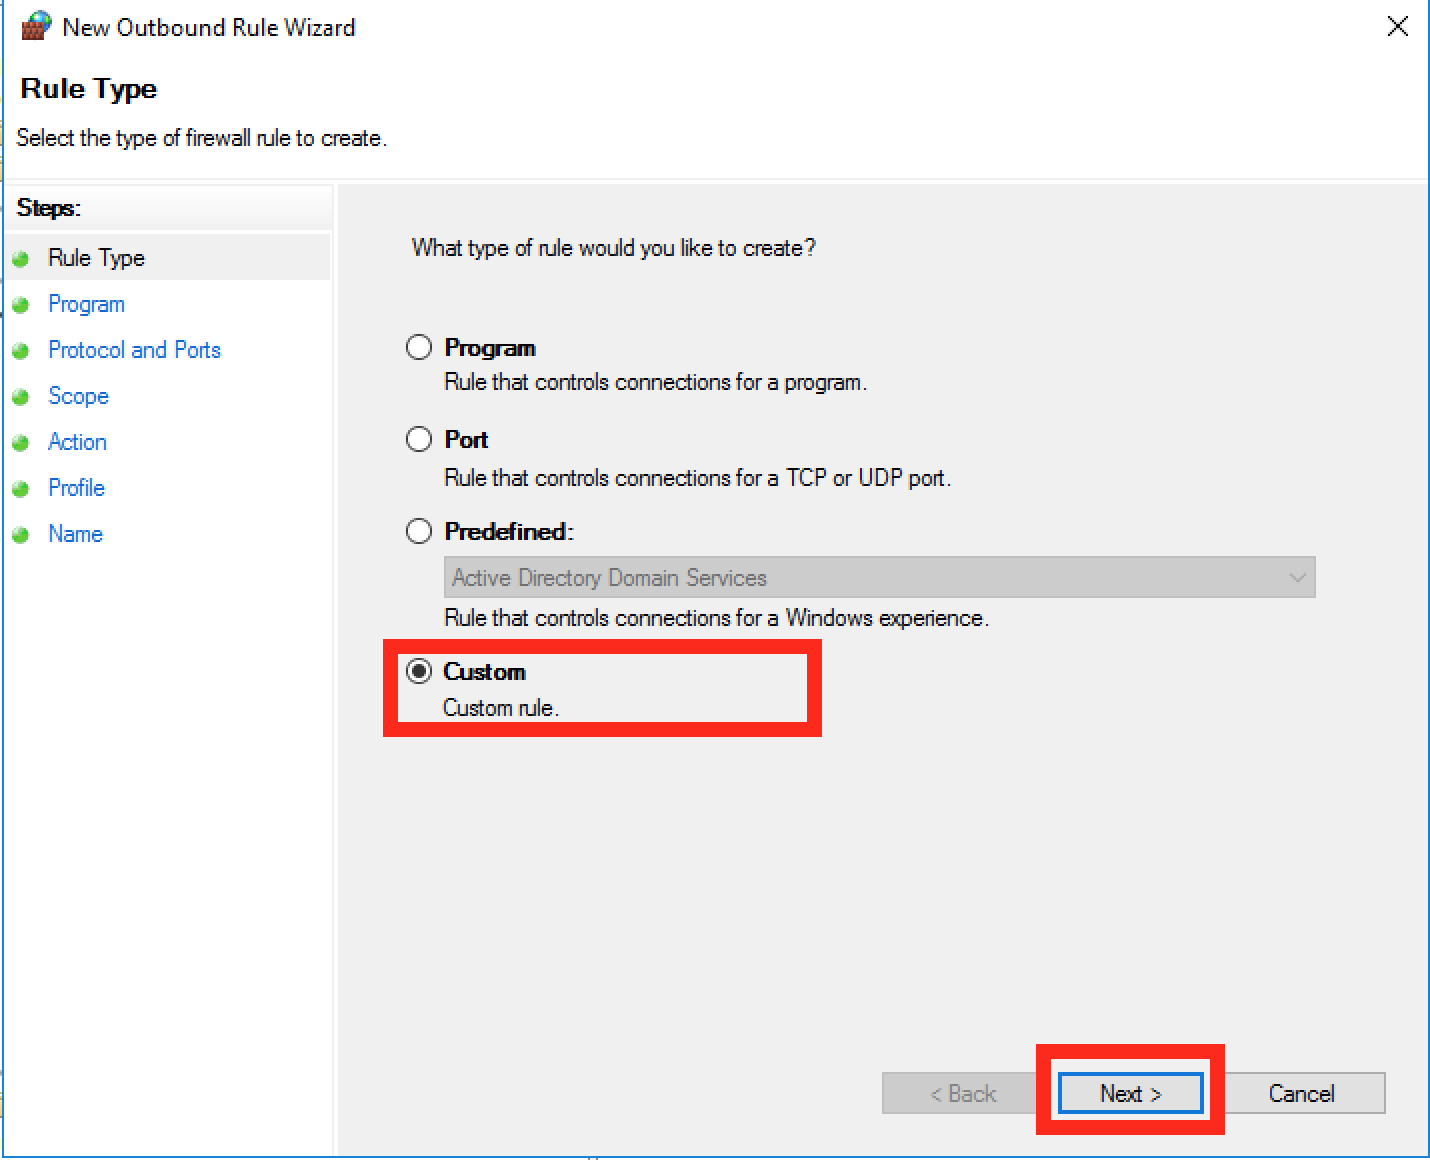
In the box which pops up select a “Custom Rule” and then click Next:
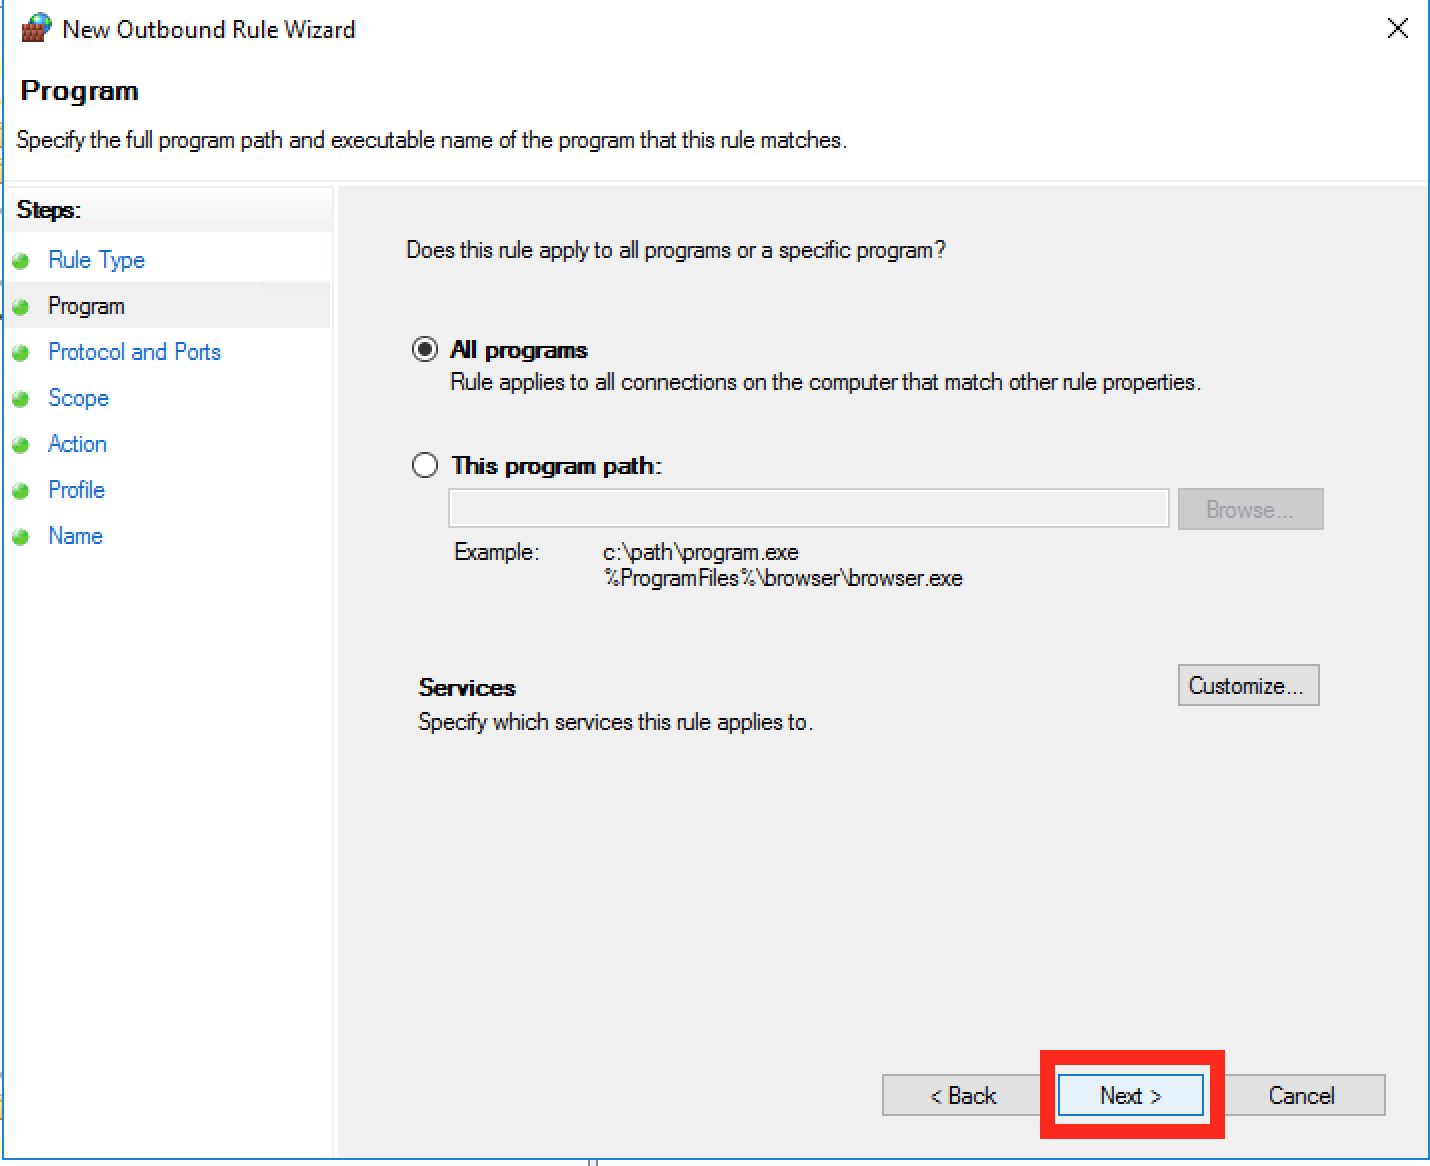
Leave the default as “All Programs” and click Next:
Leave the defaults as “Any” protocol and click Next:

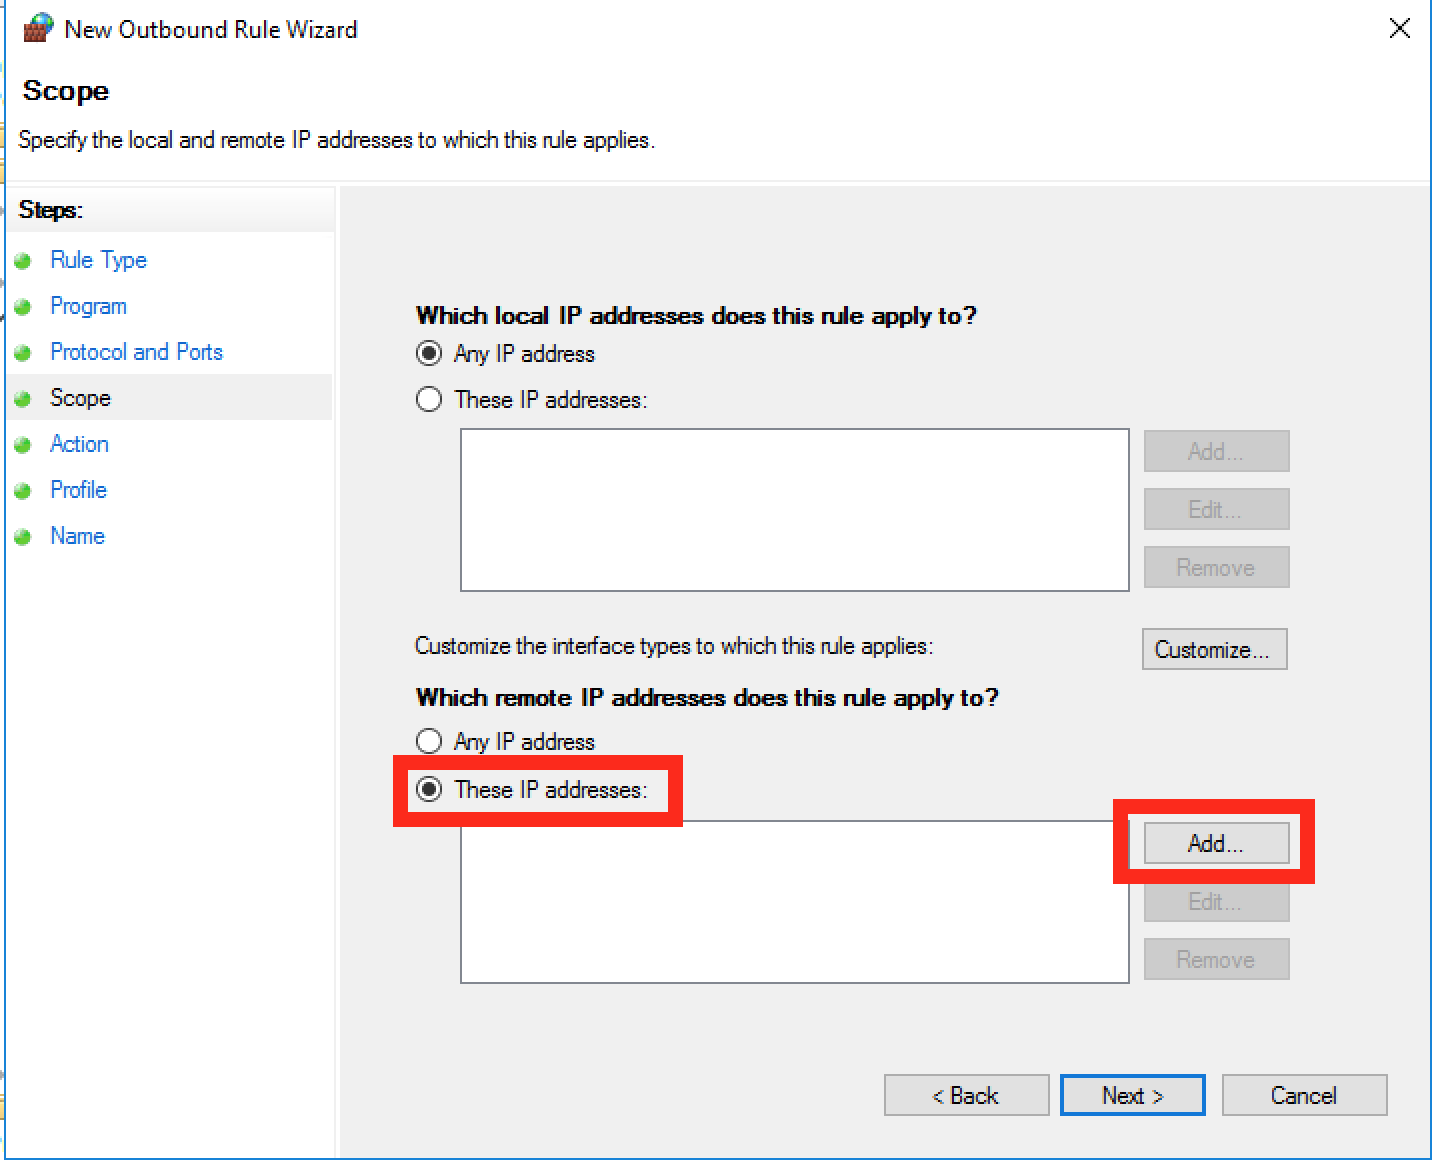
This next screen is where we’re going to add the majority of our settings, under the “remote IP addresses” select “These IP addresses” and click “Add”:
On the next popup we’ll want to add some IP ranges, so click on “This IP Range” and enter this as the range 0.0.0.1 – 9.255.255.255, just like this:
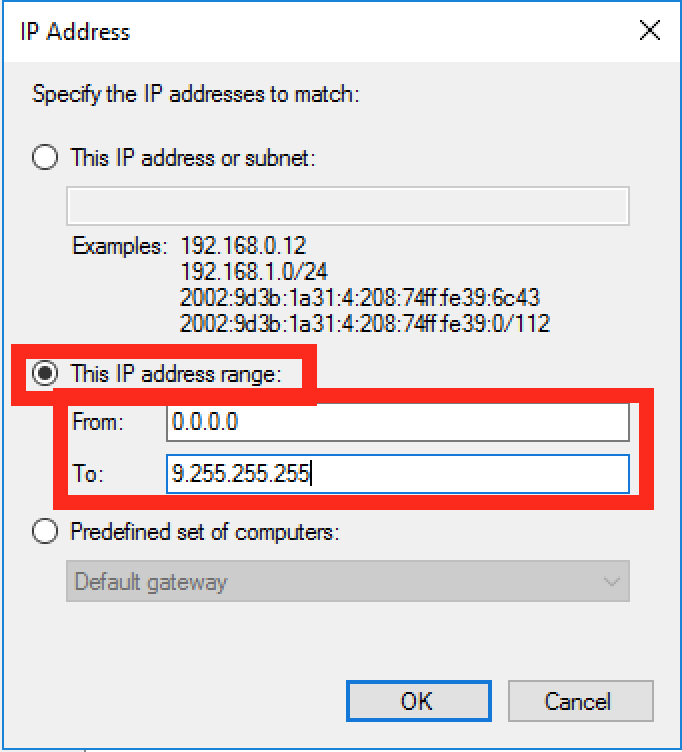
You will have to repeat the two steps above to add the following IP ranges, (the list below contains the one above by the way so you needn’t add it twice!):
0.0.0.1 – 9.255.255.255
11.0.0.0 – 126.255.255.255
128.0.0.0 – 169.253.255.255
169.255.0.0 – 172.15.255.255
172.32.0.0 – 192.167.255.255
192.169.0.0 – 198.17.255.255
198.20.0.0 – 255.255.255.254
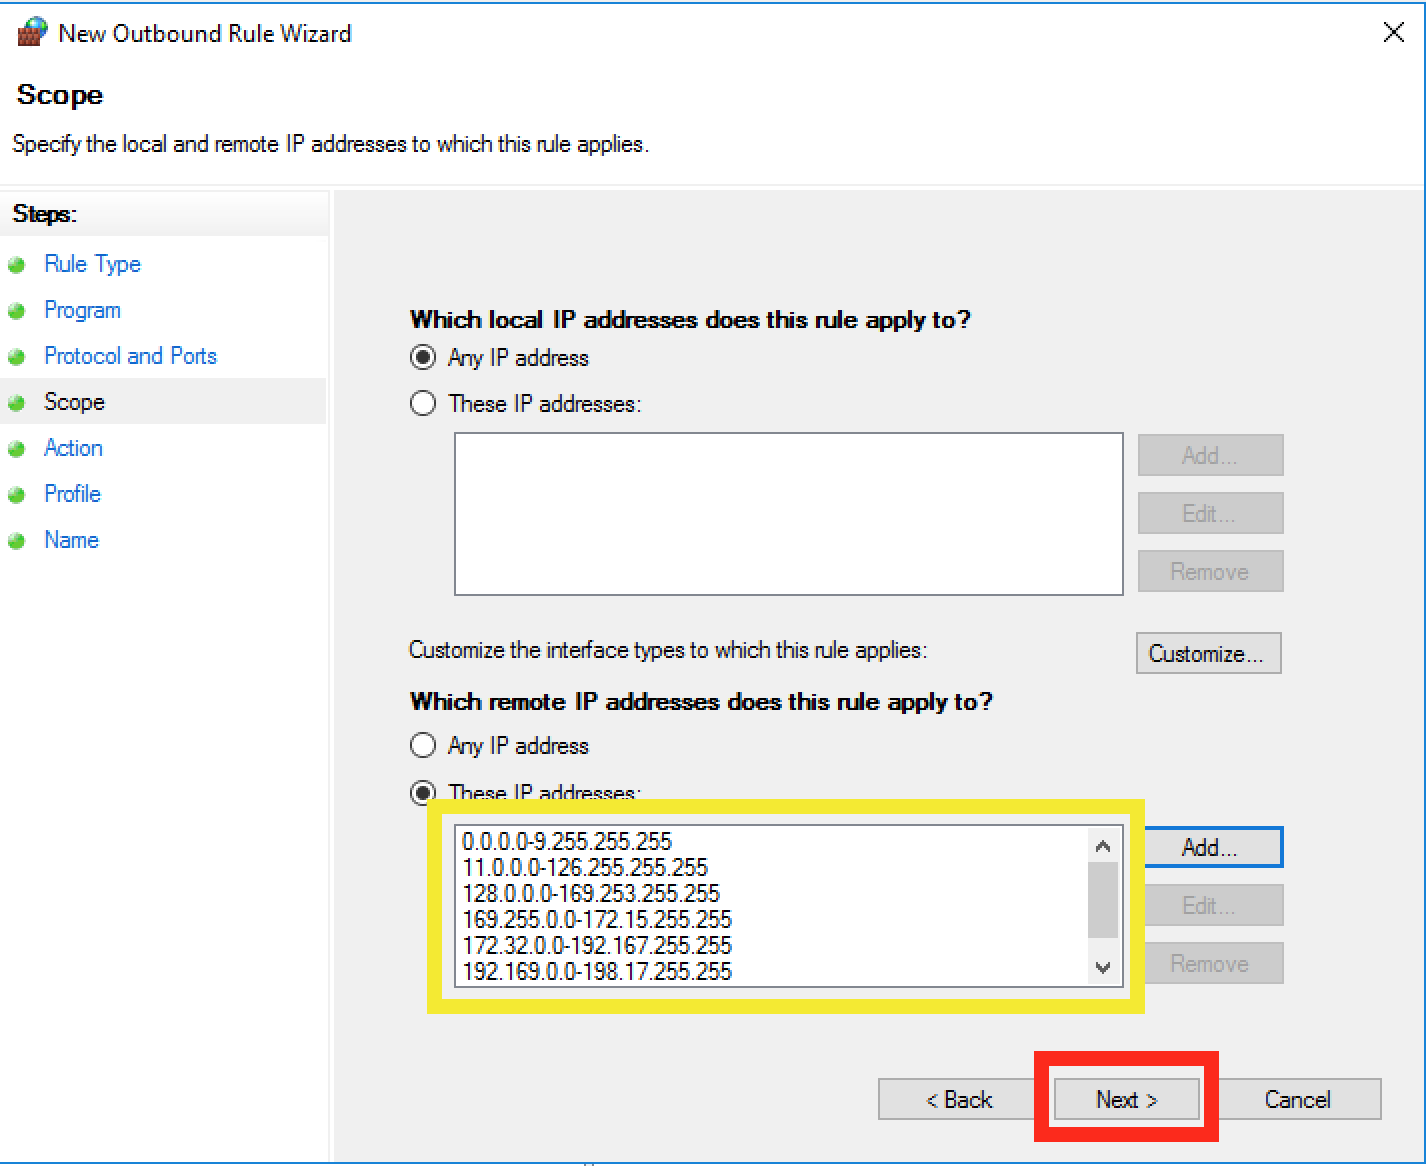
When you’re done with that list you should have a screen which looks like the following, if you’re happy click “Next”:
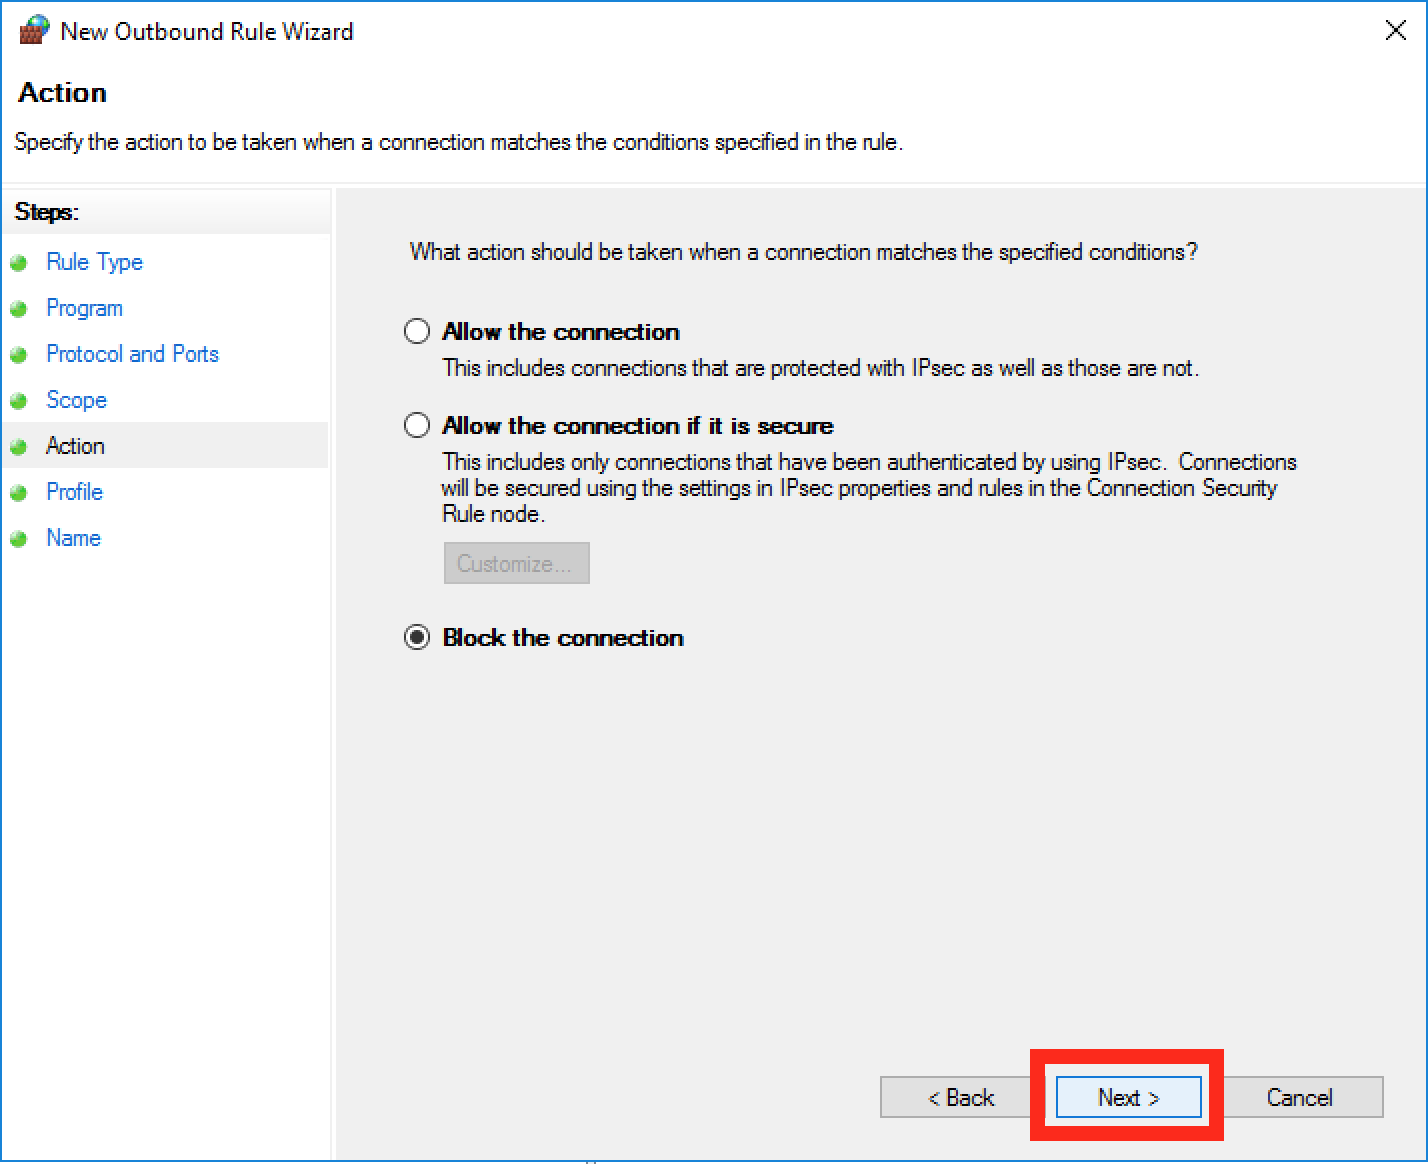
On the next screen make sure the action is highlighted as “Block” and click “Next”:
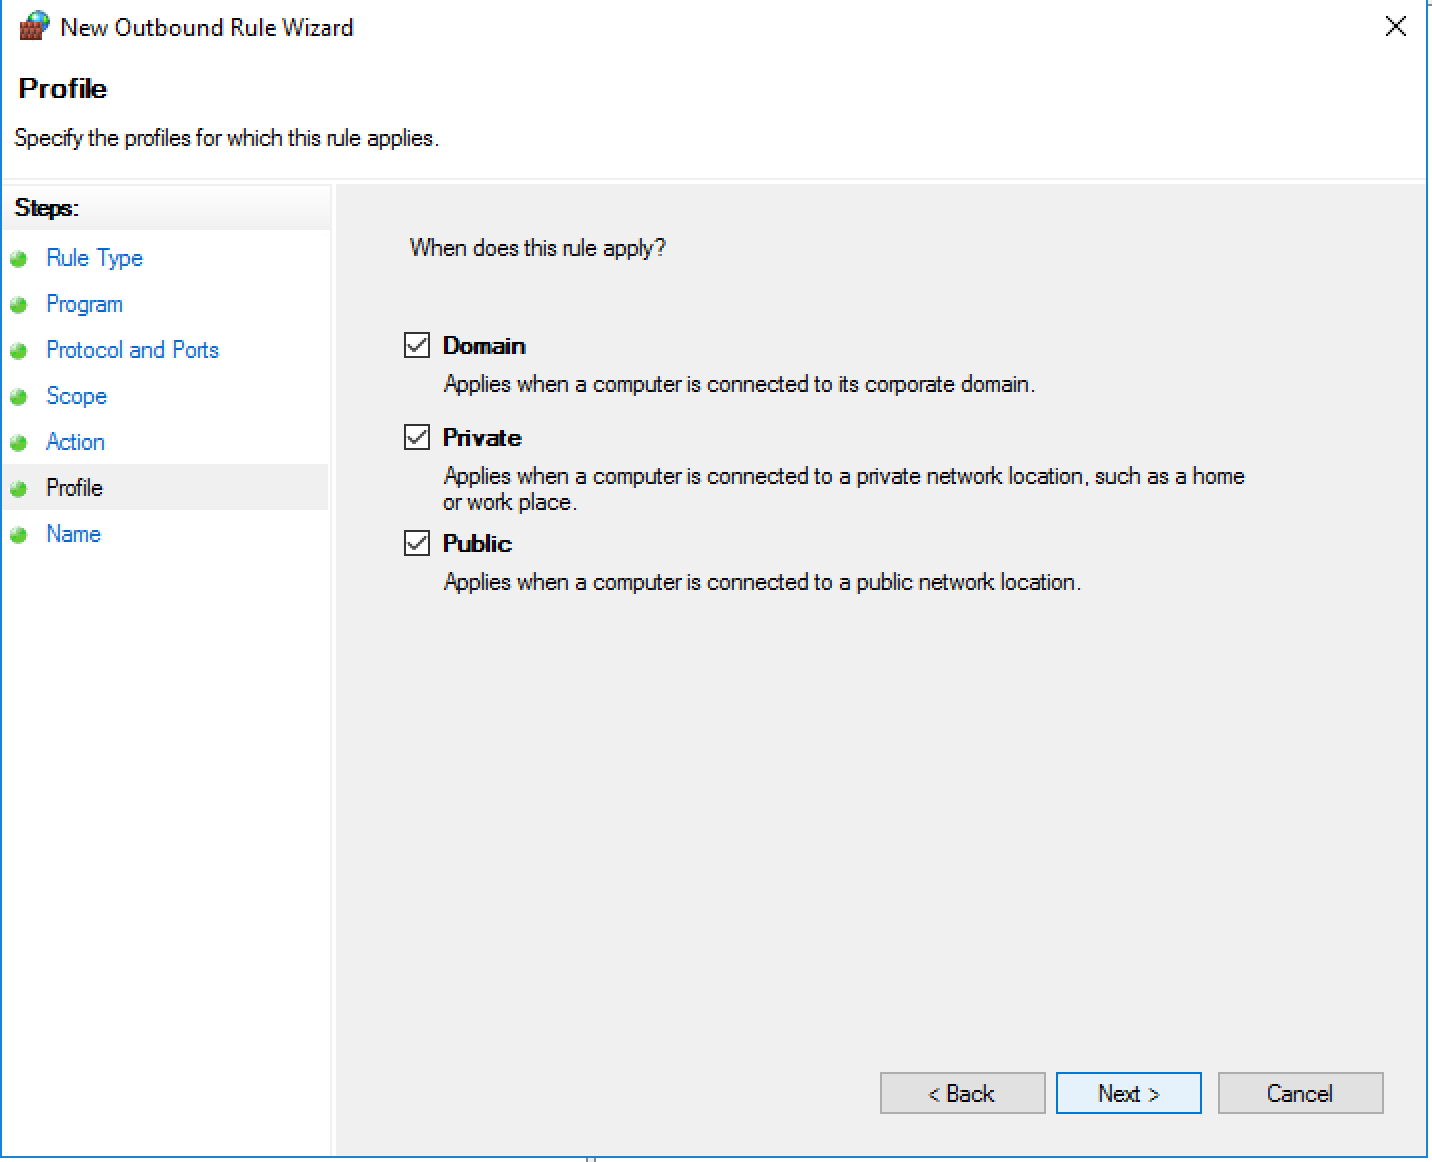
Under the profile you may want to leave all these locations ticked and then click “Next”:
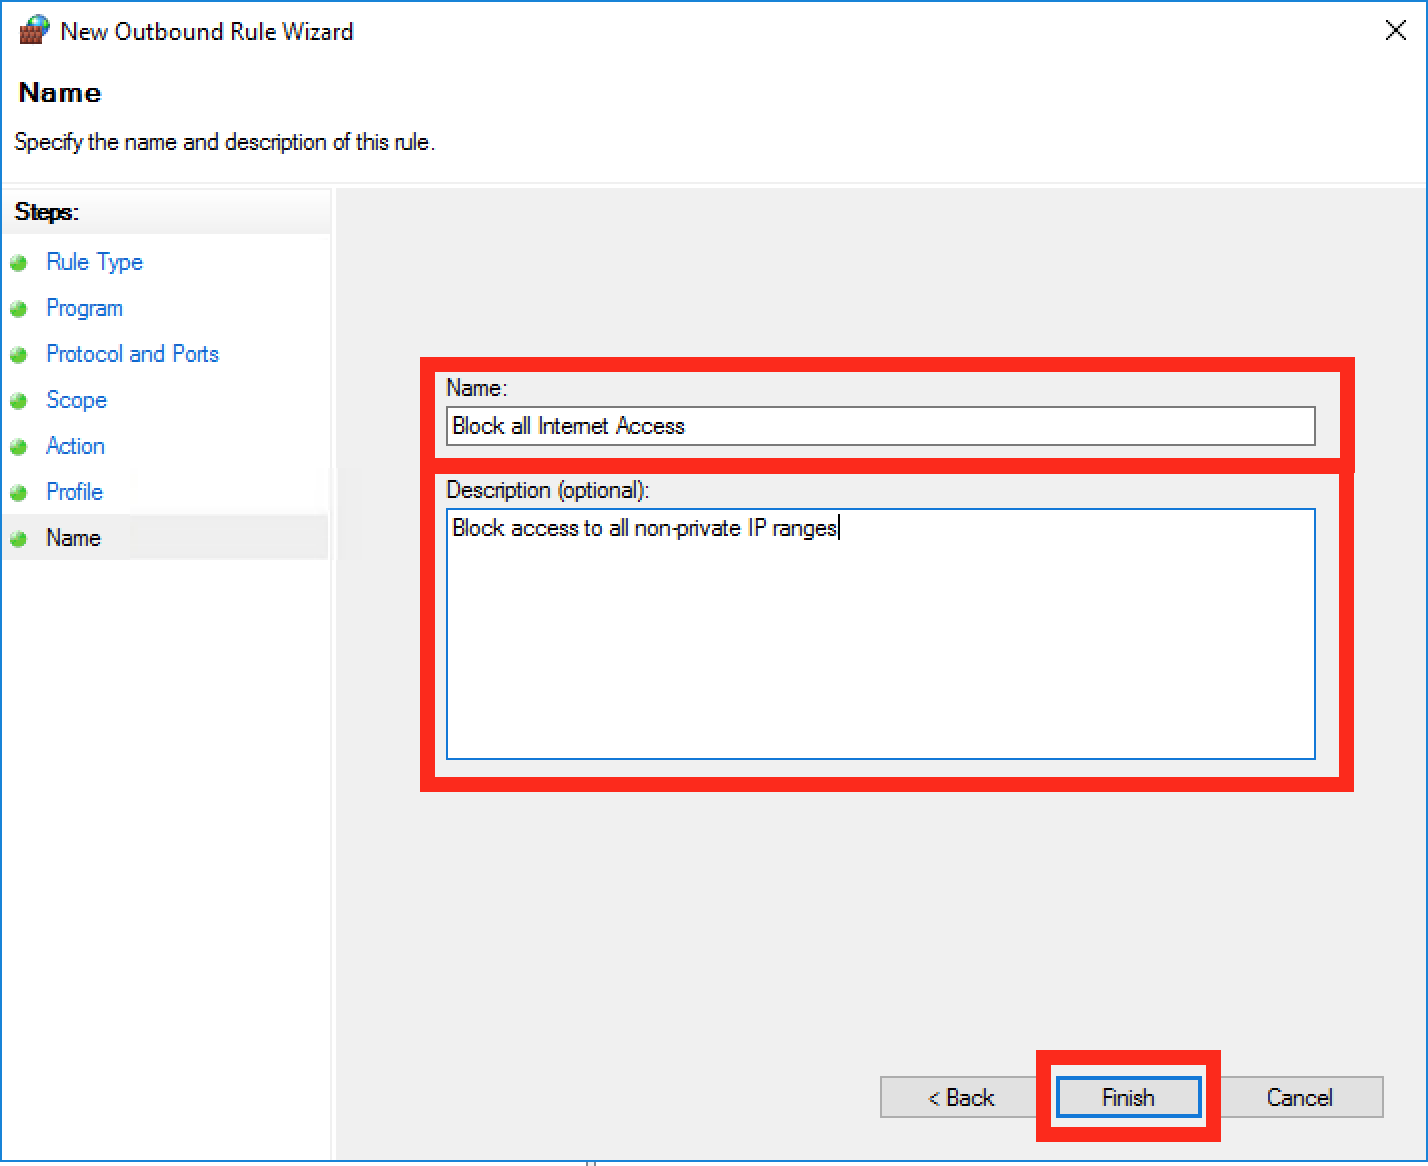
Give the rule a sensible name and click “Finish”:
Internet Settings GPO
Next we will need to setup the fake proxy as per the majority of advise out there regarding such things. You may need to download the IE admin pack first though.
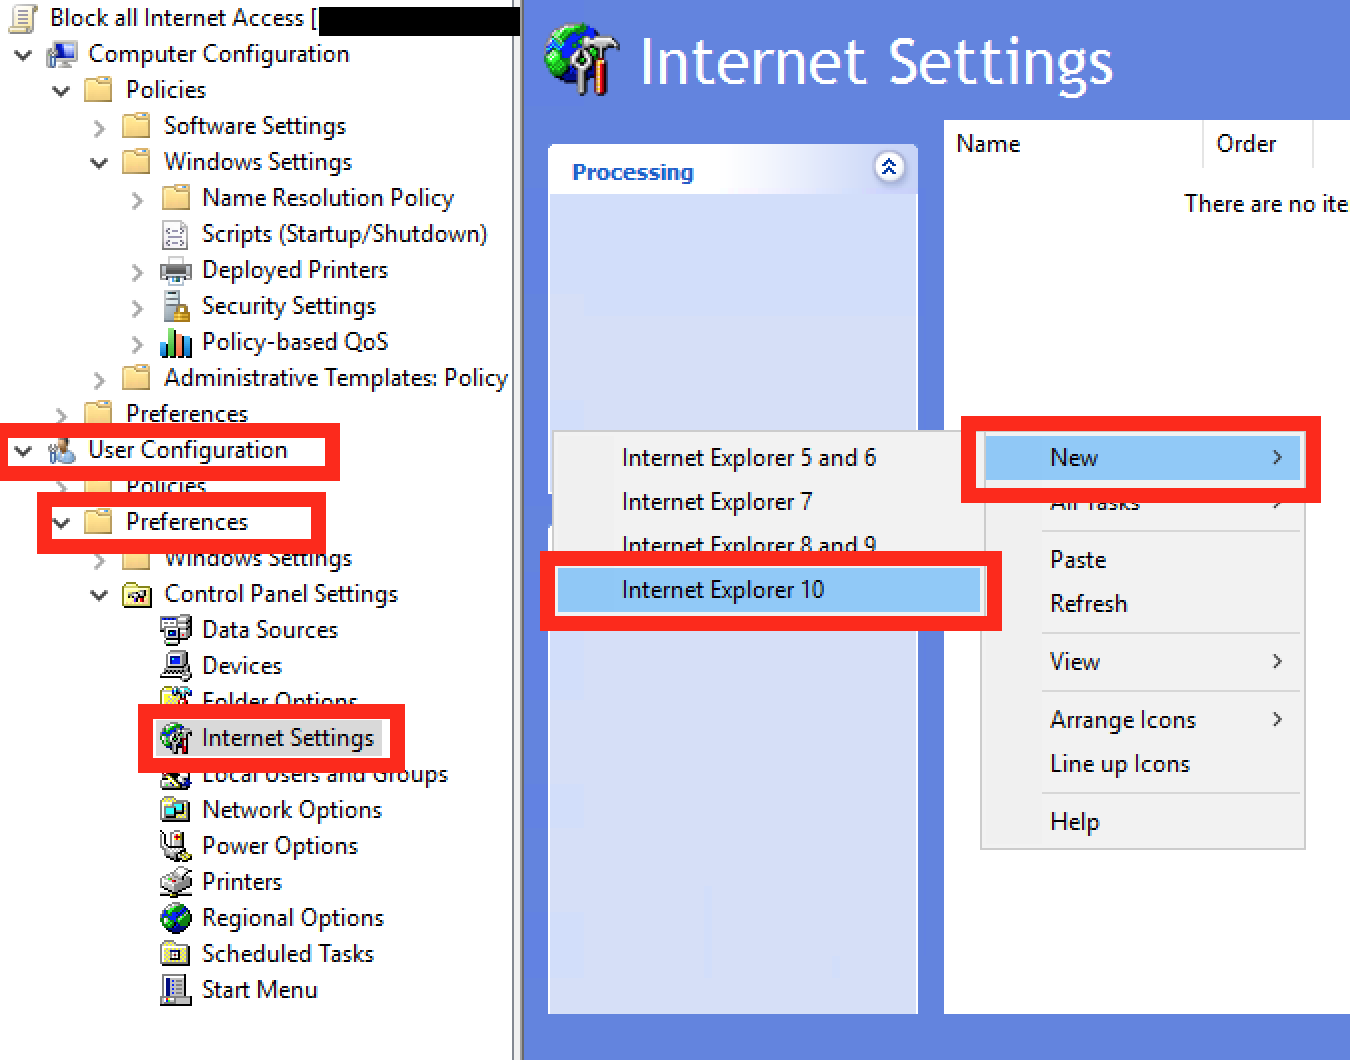
Navigate through to User Configuration – Preferences – Control Panel Settings – Internet Settings, and right click on create a New setting in the right hand panel.
Then click Connections then LAN Settings:
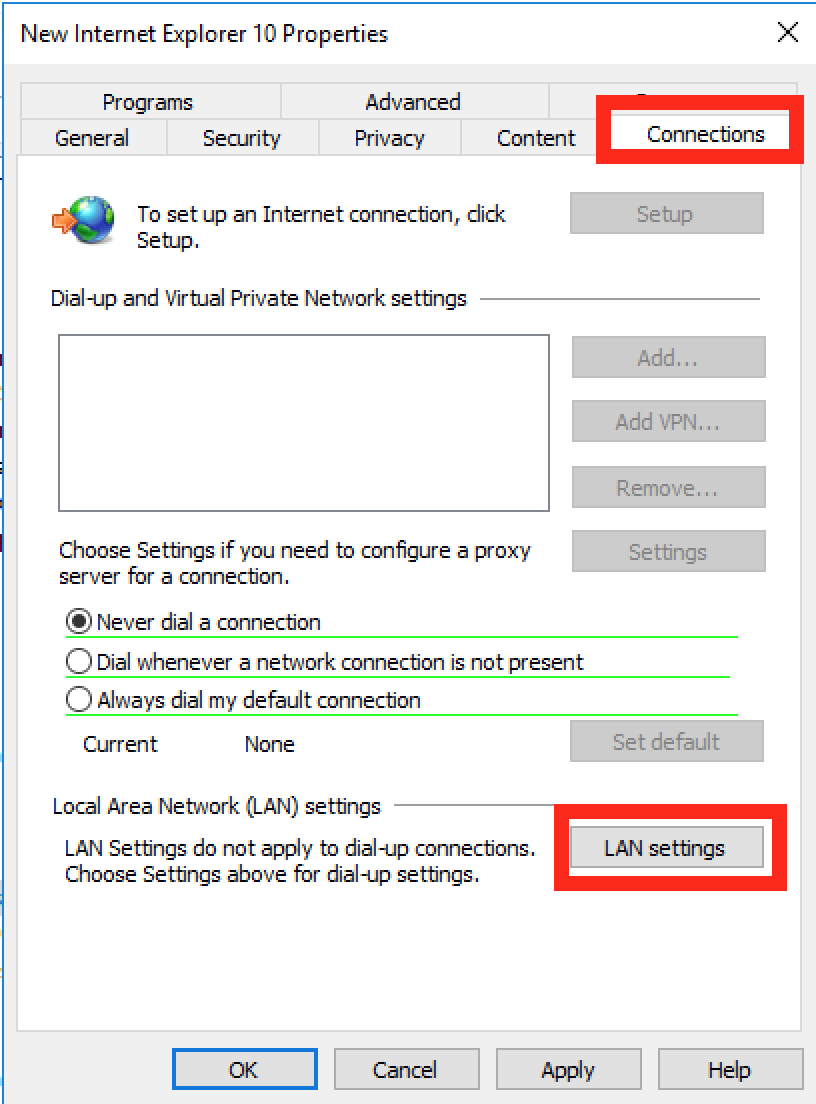
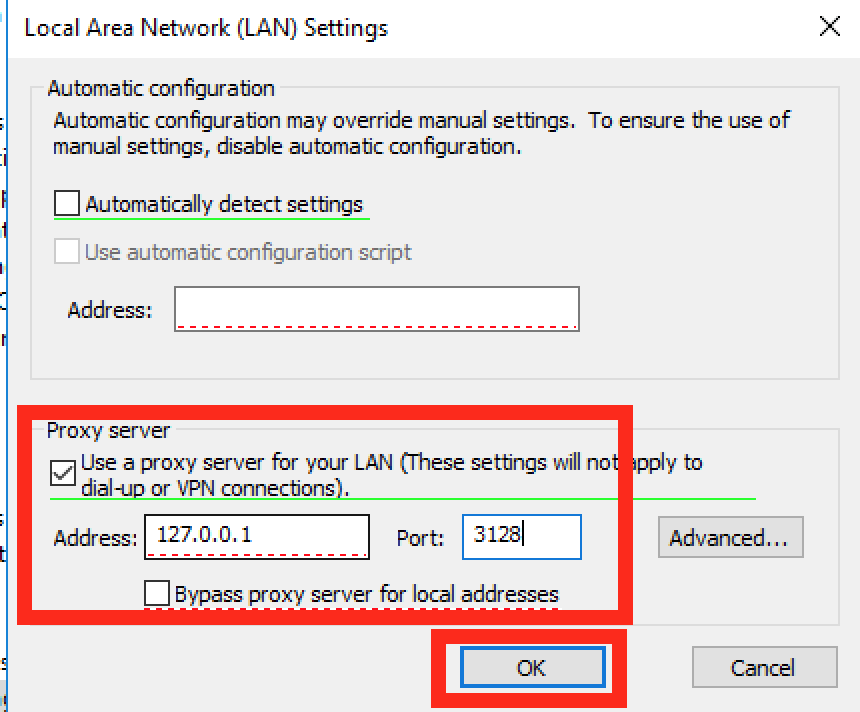
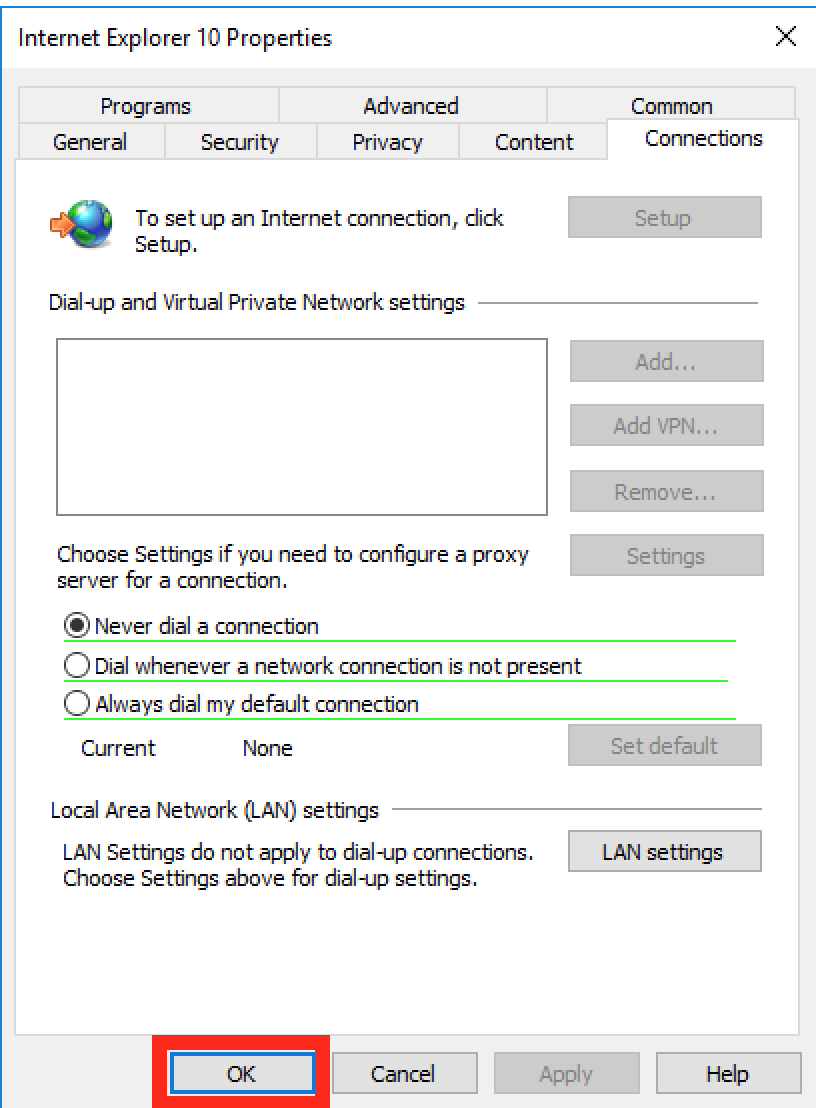
In the box that pops up tick the “Use a proxy server for your LAN” and in the address box type in “127.0.0.1” on port “3128”, just like this and then press Ok and Ok again to get back to the main GPO screen.
Next within our GPO go through to User Configuration – Administrative Templates – Windows Components – Internet Explorer.

On the right hand side you want to find the option which reads “Disable changing connection settings”, when you’ve found it open it up by double clicking:
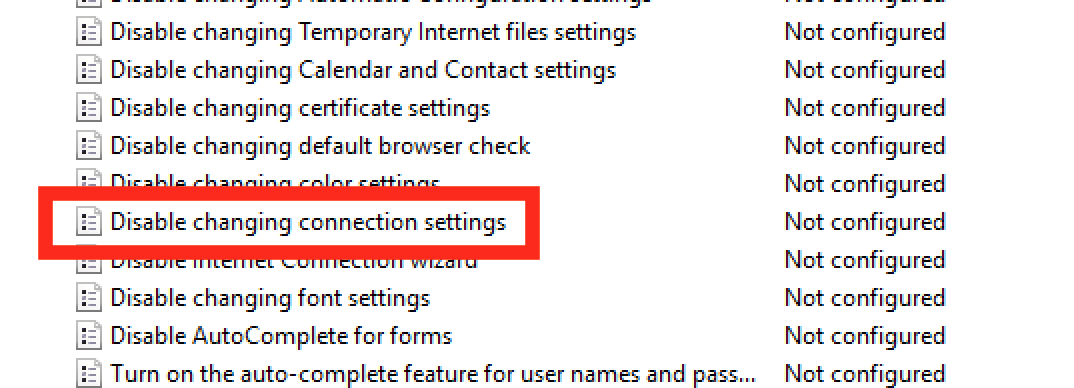 Make this setting enabled and click Ok.

Close down all the GPO windows and you’re done!

7 Comments
Thank you for this article. I am looking for a simple way to ONLY ALLOW G_MAIL in my classroom. Is it possible to adapt the GPO settings to achieve that ?
Hi Willem,
Horribly late reply sorry 🙁
This would be very difficult and the only way you could do it I can think of would be to use a proper proxy to enforce gmail.
Doing it from IPs saying that Google have many of them would allow things like Google Search and other Google services inadvertantly.
Sorry for the bad news, but thanks for reading,
Gyp
Hello.
A great way to block internet for clients via GPO.
But there is an error which can be quite nerve wrecking.
The last IP range:
198.20.0.0 – 255.255.255.255 blocks also the IP 255.255.255.255, which is a IP broadcast used for getting DHCP.
If you deploy this to a large number of computers, they will gradually start to loose connection since none will be able to renew IP.
Had to find out the hard way.
The correct range should be:
198.20.0.0 – 255.255.255.254
Hi Peter,
Thanks for the kind words and apologies for the oversight on my part! I shall update the post now with your feedback.
Many thanks and much appreciation,
Gyp
Good article , if you are going to use this in mixed environment like windows xp, windows 7 and 10 , i recommend that you change the 1st scope to : 0.0.0.1 – 9.255.255.255 and the last scope to be 198.20.0.0 – 255.255.255.254 so you dont interfere with the pcs getting an ip from the dhcp server. unless the pcs are static assign..
Hi Lou,
Thanks for dropping by and thank you for the feedback, very useful thank you. I shall update the main post now.
Thanks again,
Gyp
Hi
Thanks for your tutorial, trying to work this into my setup.
If i choose “authenticated users” this works, and internet is blocked. But i dont need it that way, i need to block only a single user from accessing the interwebs. So in the GPO i picked the users and removed “authenticated users” But then its not working, and the GPO is not being inforced. Do you know what could be the problem ?