
After one of my recent tutorials about a host to host Linux VPN this post is a how to create a host to host VPN between Windows 2012 and Ubuntu 14.04. We’ll be using the inbuilt Windows Firewall with Advanced Security and Strongswan.
A lot like my last tutorial I couldn’t find any decent information out there how to get an IPSec connection between Microsoft and Linux, but since IPSec is an open standard I was confident it should work. After spending a lot of time working through how to do this I decided to write this post to hopefully help other people out in the same situation.
Although this post is written for Ubuntu, I see no reason why it shouldn’t work with any other distribution. As for Windows; I’ve only tried this on Windows Server 2012 R2 and can’t vouch for any other flavor. Incidentally this is my first post with anything in-depth for Windows since 2011!
We will also follow the same rules as my last post:
- This approach won’t work if there is any NAT between our Windows and Linux boxes
- Since we are going for quick and easy we will be using a pre-shared key for authentication
The examples I’m working with look like the following:
Green Server – Windows 2012 R2 – 192.168.100.100/24
Yellow Server – Ubuntu 14.04LTS – 192.168.100.200/24
Instructions – Green Server
Logon to your server, and open up “Windows Firewall with Advanced Security”
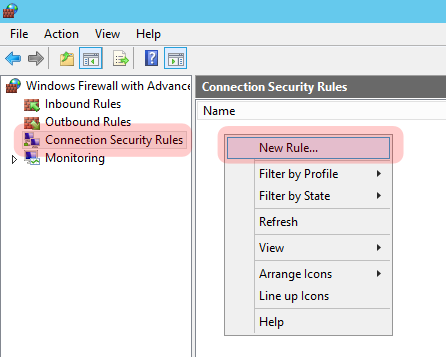
Navigate down to “Connection Security Rules”, right click in the white space to the right and select “New Rule”
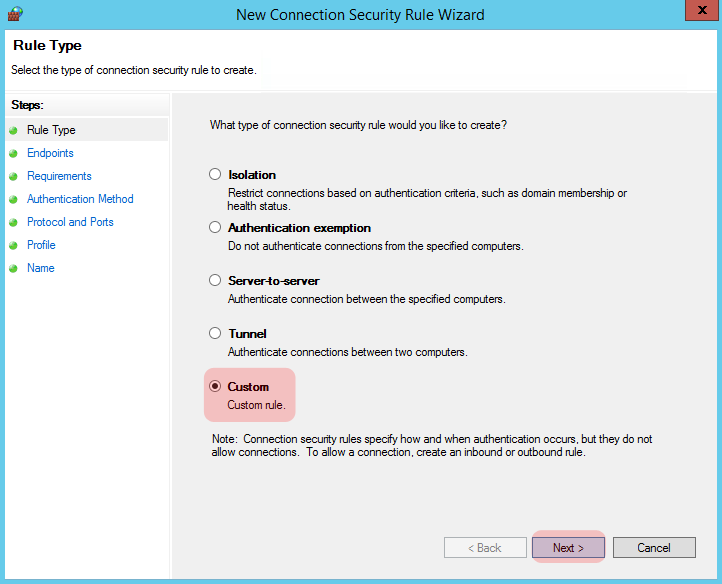
A box like the following should pop up. Select “Custom Rule” in the radio buttons and click “Next”
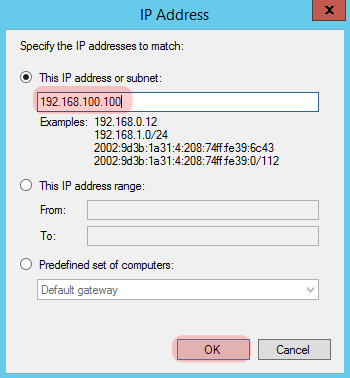
On the next screen, select “These IP Addresses” and click “Add” by the window at the top for “Endpoint 1”.
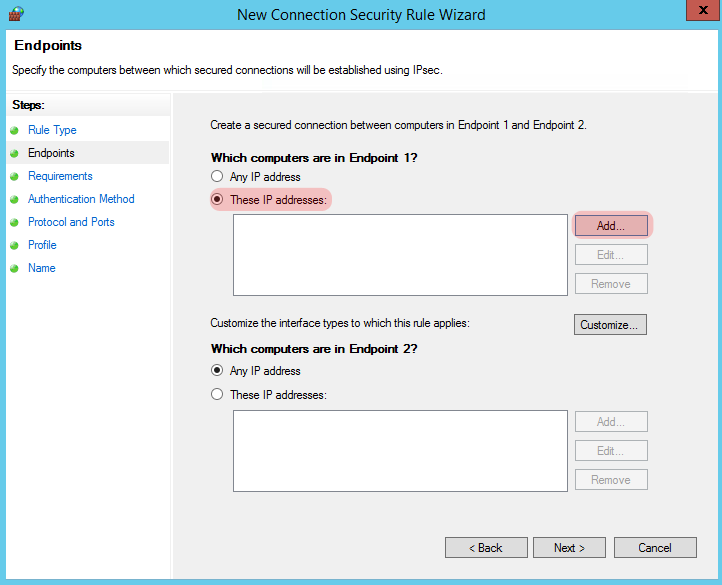
Put in the IP address of your Windows box and click “Ok”.
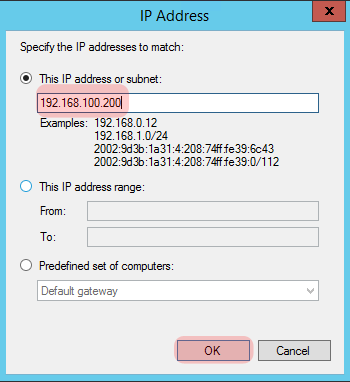
Repeat the process for “Endpoint 2” which is going to be our Linux machine:
Your screen should now look like the screen below, if you’re happy with the two Endpoints, click on Next.

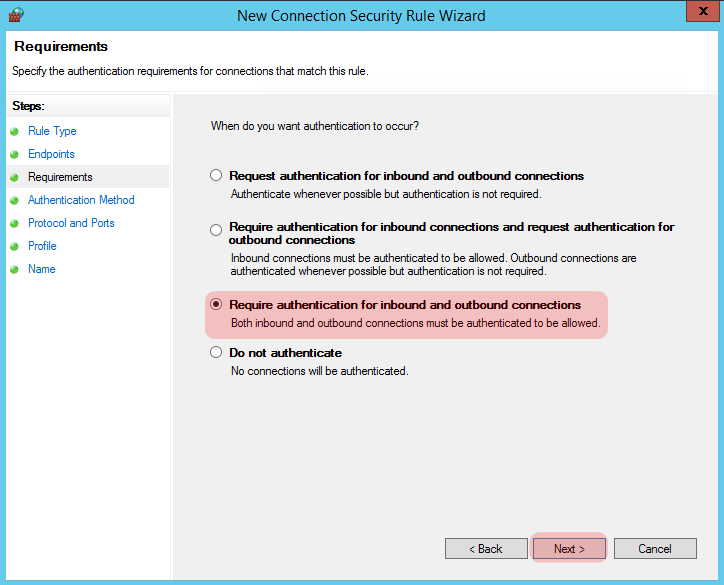
The next screen is fairly self explanatory, but we want to select “Require authentication for inbound and outbound connections”, this will set our Phase 1 and tunnel mode pretty much how we want it.
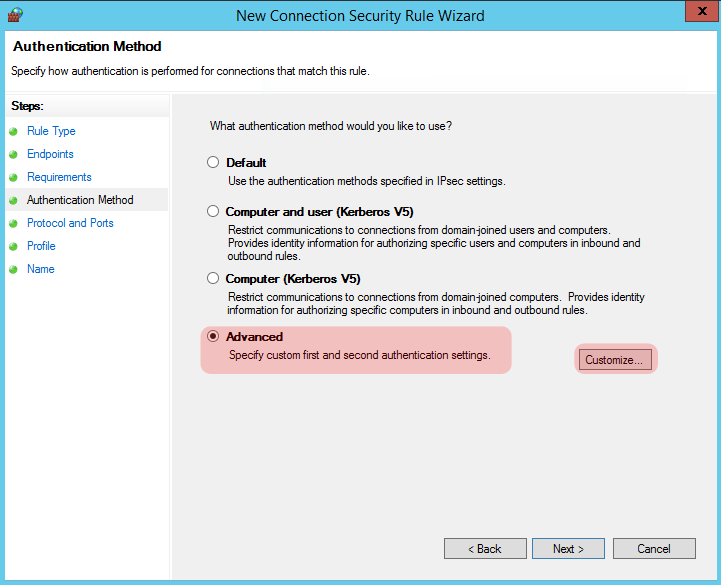
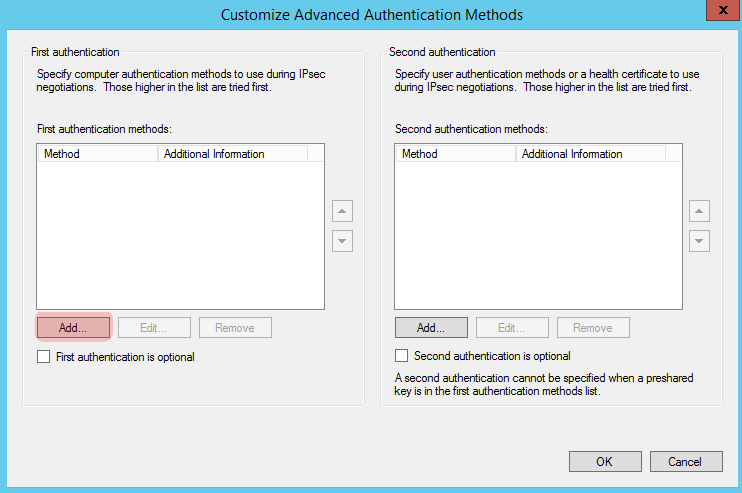
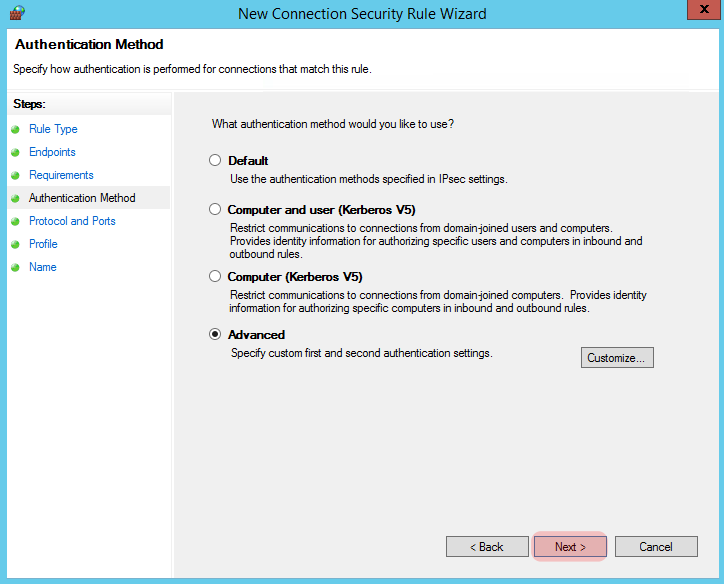
On the next screen we want to specify “Advanced” since we will be using a pre-shared key, select the appropriate radio button and click “Customize”
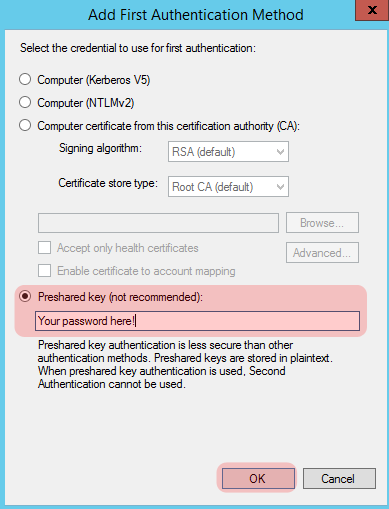
Click “Add” for our first Authentication setting.
Select the radio button for “Preshared key (not recommended)”, and type in your preferred password, then click “Ok”.
You should be back at the “Customize Advanced Authentication Methods” screen, review it and if you’re happy with it press “Ok”.
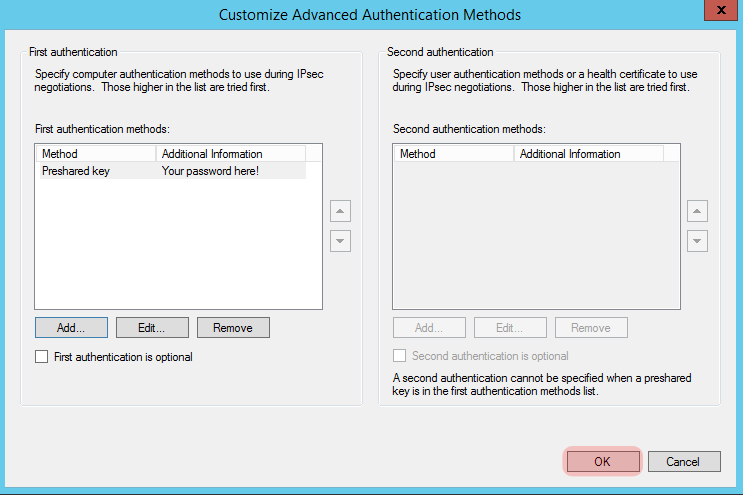
We should be happy with the next screen so press “Next”.
On this next one I’m happy in that I want all the traffic between the two hosts encrypted, however you may want to specify encryption for specific protocols, for instance Telnet, for this tutorial I’m content with everything so I click “Next”.
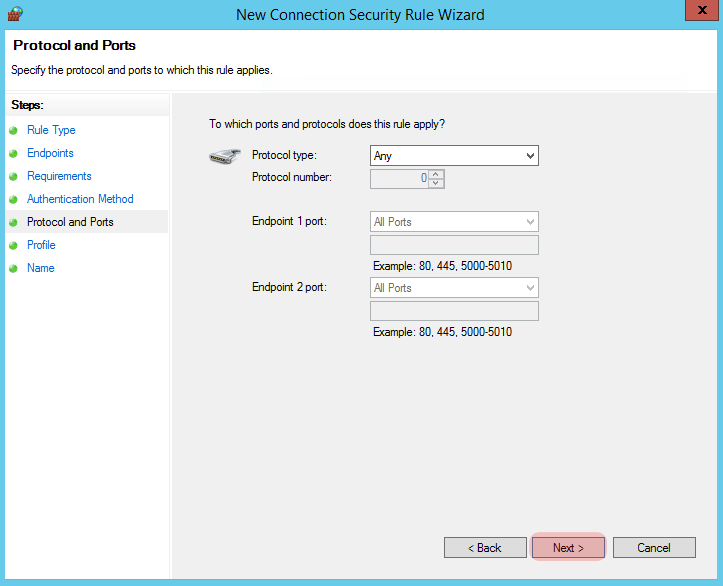
This next screen again I’m happy that this tunnel will always be online, so I click “Next”.
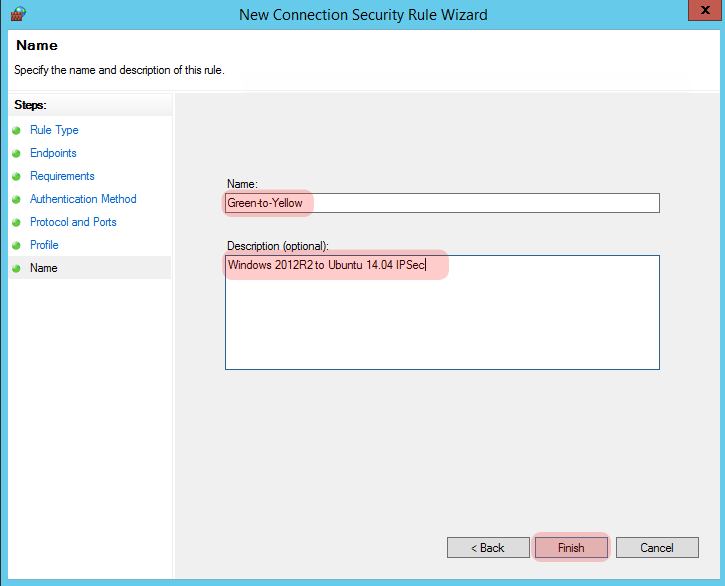
On this next one I’ve given the tunnel a sensible name and description, when you’re ready click “Finish”.
You should now see something like the following:
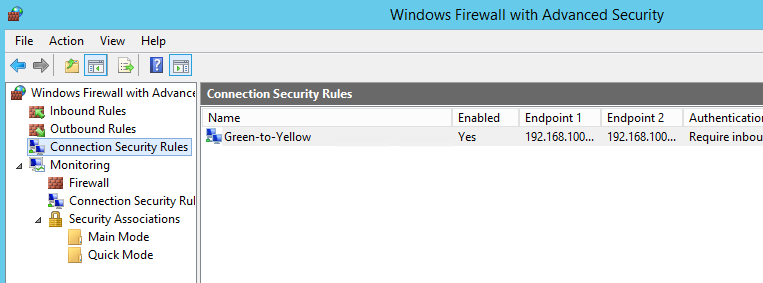
DO NOT turn off the Firewall on your Windows Server, I made the naive error of doing this and my tunnel wouldn’t work, then I realised that the Firewall Service contains the IPSec… Turning it back on fixed the issue immediately.
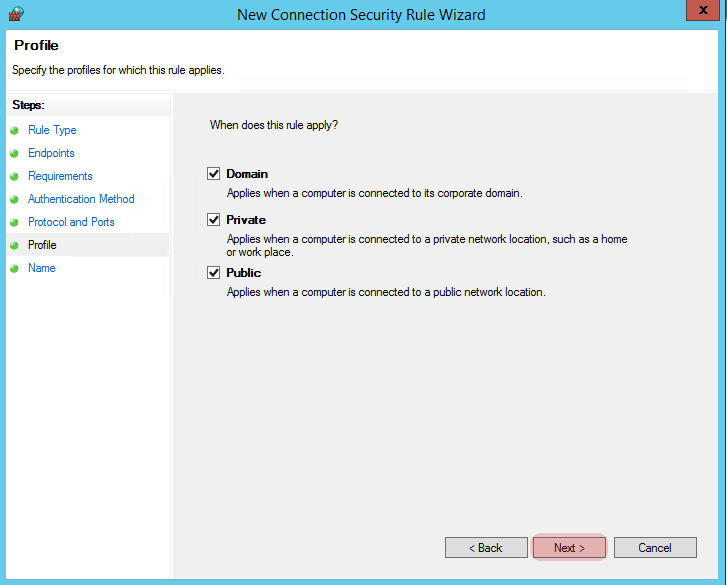
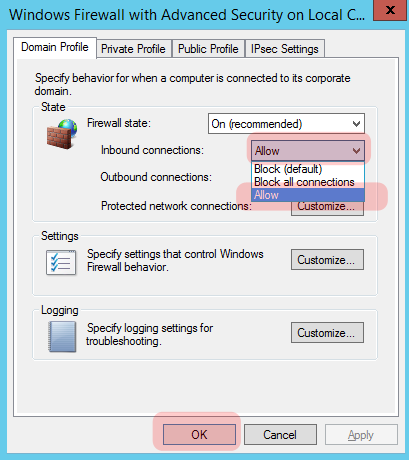
WARNING: You may want to create some granular firewall rules for your IPSec tunnel, especially if you’re communicating over a non-secure network, but for this tutorial we’re going to allow all inbound traffic on the Domain profile.
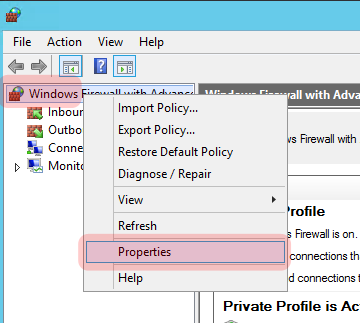
Right click on “Windows Firewall with Advanced Security” at the top of the tree, and click “Properties”.
Set “Inbound connections” to “Allow”, then click “Ok”.
You’re done on the Windows Server for now, let’s now move on to the Ubuntu Server.
Instructions – Yellow Server
SSH into your Ubuntu Server box.
Lets go ahead and install the Strongwan package if it’s not already installed.
apt-get install ipsec-tools strongswan-starter
Now lets create the settings on our Linux server which compliment those on the Windows server.
nano /etc/ipsec.conf
If you’ve followed the instructions in the previous section, you should put the following on the bottom of that file.
conn yellow-to-green
    authby=secret
    auto=route
    keyexchange=ikev1
    left=192.168.100.200 #This is the IP of Ubuntu
    right=192.168.100.100 #This is the IP of Windows
    type=transport
Now we need to add our secrets to the appropriate file.
nano /etc/ipsec.secrets
If you have anything in that file already, put the following at the bottom.
192.168.100.100 192.168.100.200 : PSK "Your password here!"
Give IPSec a restart:
ipsec restart
You’re all done!
Testing and Monitoring
On your Ubuntu server run the following to ping the Windows Server once, this command should generate some traffic which brings the tunnel up which we configured.
ping -c 1 192.168.100.100If you see a reply like the below it’s a good sign!
PING 192.168.100.100 (192.168.100.100) 56(84) bytes of data.
64 bytes from 192.168.100.100: icmp_seq=1 ttl=128 time=0.523 ms
Lets see what state the IPSec is in.
ipsec statusallStatus of IKE charon daemon (strongSwan 5.1.2, Linux 3.13.0-24-generic, x86_64):
uptime: 3 minutes, since Jul 25 18:24:23 2015
malloc: sbrk 1486848, mmap 0, used 333200, free 1153648
worker threads: 11 of 16 idle, 5/0/0/0 working, job queue: 0/0/0/0, scheduled: 2
loaded plugins: charon test-vectors aes rc2 sha1 sha2 md4 md5 random nonce x509 revocation constraints pkcs1 pkcs7 pkcs8 pkcs12 pem openssl xcbc cmac hmac ctr ccm gcm attr kernel-netlink resolve socket-default stroke updown eap-identity addrblock
Listening IP addresses:
192.168.100.200
Connections:
yellow-to-green: 192.168.100.200…192.168.100.100 IKEv1
yellow-to-green: local: [192.168.100.200] uses pre-shared key authentication
yellow-to-green: remote: [192.168.100.100] uses pre-shared key authentication
yellow-to-green: child: dynamic === dynamic TRANSPORT
Routed Connections:
yellow-to-green{1}: ROUTED, TRANSPORT
yellow-to-green{1}: 192.168.100.200/32 === 192.168.100.100/32
Security Associations (1 up, 0 connecting):
yellow-to-green[1]: ESTABLISHED 3 minutes ago, 192.168.100.200[192.168.100.200]…192.168.100.100[192.168.100.100]
yellow-to-green[1]: IKEv1 SPIs: b6797bd87167206f_i cbe1c616d5228073_r*, pre-shared key reauthentication in 2 hours
yellow-to-green[1]: IKE proposal: AES_CBC_128/HMAC_SHA1_96/PRF_HMAC_SHA1/MODP_1024
yellow-to-green{1}: INSTALLED, TRANSPORT, ESP SPIs: cdbc79dd_i 24d280fe_o
yellow-to-green{1}: AES_CBC_128/HMAC_SHA1_96, 8224 bytes_i (205 pkts, 0s ago), 8224 bytes_o (205 pkts, 0s ago), rekeying in 38 minutes
yellow-to-green{1}: 192.168.100.200/32 === 192.168.100.100/32
If it’s saying “ESTABLISHED” then we’re good to go! Lets just double check the 2012 box.
Expand out “Monitoring”, “Security Associations” and “Main Mode” and hopefully you see a screen like the one below.
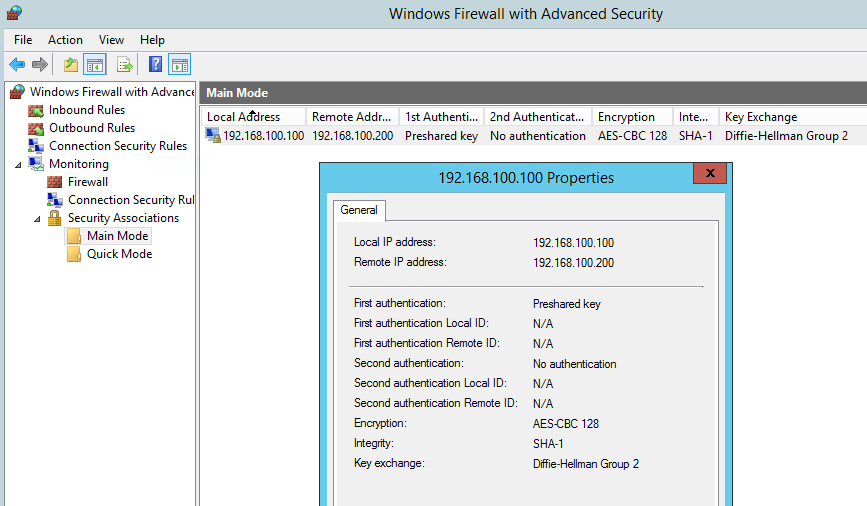
Congratulations! You now have a working IPSec point to point connection.
If you’ve hit problems anywhere or it’s not working, make sure you have specified the end points correctly both on Ubuntu and Windows, double check your preshared key, make sure IPTables on Ubuntu isn’t getting in the way and also make sure you haven’t turned off the Windows firewall.


16 Comments
Hi,
I have question here. Could you please help me in setting up the same with Linux OpenSuSE and Windows 2012 R2 instead of Ubuntu.
Thanks in advance.
Hi Sagar,
openSUSE isn’t my distro of choice 🙂 However a very quick search shows that strongSwan is available and a tutorial here:
https://forums.opensuse.org/showthread.php/435097-Strongswan-on-openSuSe-11-2-quick-setup
I’d imagine as long as you can install strongSwan on SUSE you should be fine to follow the rest of the tutorial.
Thanks for dropping by and thanks for taking the time to comment!
Gyp
Have you run into any issues where the IPsec connection works (CentOS 6 and Windows 2012) fine, but after an hour or so, it stops allowing traffic and you have to restart strongswan?
Exact same configuration you have, except StrongSwan version 5.4.0 on CentOS 6 (and I’m also using Certificate authentication, but not sure that matters).
Hi Andrew,
I’ve not come across that particular problem before between CentOS and Windows 2012, however if it’s around an hour it sounds like it may potentially be a re-keying issue on the tunnel.
Have a look at “ikelifetime = xh” and “lifetime = 1x” within the config on the Linux box and make sure they are as they should be compared with https://technet.microsoft.com/en-us/library/cc947834(v=ws.10).aspx
You could also try turning up the logging and see if that sheds any light https://wiki.strongswan.org/projects/strongswan/wiki/LoggerConfiguration.
Sorry I can’t be more help, but please let us know how you get on!
Gyp
Thanks for the information! I will look at that. Also thanks for your entire document as well. I’m glad to see people post their knowledge on the Internet to help others 🙂
I just put in “rekey=no” to see if that helps. I did notice the Main Mode connection is lasting longer now (In Windows Firewall). This is one of the errors I’m getting, but I’m hoping the “rekey=no” and what you sent me will help. I will keep you posted.
Mar 8 14:11:25 myhostname charon: 15[KNL] creating rekey job for CHILD_SA ESP/0xc9217a4c/10.0.1.220Mar 8 14:21:26 myhostname charon: 05[KNL] creating delete job for CHILD_SA ESP/0x0ee88f6a/10.0.1.8
Mar 8 14:21:26 myhostname charon: 14[KNL] creating delete job for CHILD_SA ESP/0xc9217a4c/10.0.1.220
Mar 8 14:21:26 myhostname charon: 05[IKE] closing expired CHILD_SA sqlcluster{5} with SPIs c9217a4c_i 0ee88f6a_o and TS 10.0.1.220/32 === 10.0.1.8/32
Mar 8 14:21:26 myhostname charon: 05[IKE] sending DELETE for ESP CHILD_SA with SPI c9217a4c
Mar 8 14:21:26 myhostname charon: 05[ENC] generating INFORMATIONAL_V1 request 2527734479 [ HASH D ]
Mar 8 14:21:26 myhostname charon: 05[NET] sending packet: from 10.0.1.220[500] to 10.0.1.8[500] (92 bytes)
Mar 8 14:21:26 myhostname charon: 08[JOB] CHILD_SA ESP/0xc9217a4c/10.0.1.220 not found for delete
Hi Andrew,
That log does very much look like a rekeying error to me. If the CentOS end is attempting to rekey due to a 60 minute timeout (default setting if memory serves) then this looks fairly normal.
Let me know how you get on with your investigation and if that is the issue I shall update the main post to hopefully help others in a similar situation 🙂
Thanks for the kind words too,
Gyp
Issue resolved. NSX was causing some issues on the rekey. Linux side requested it, Windows side received it, but got filtered on the response back to Linux. Stupid me!
Well found and well fixed! Thanks for letting us know. I shall stick a “gotcha” on the main post!
Gyp
Hi Gyp,
i follow your detailed guide, but i cant connect Win to Linux.
I have double checked firewall (Linux and Win), ip address Endpoint 1 and Endpoint 2 , Windows firewall rules and ipsec configuration Linux side….
Ping dont give replay
PING 192.168.100.100 (192.168.100.100) 56(84) bytes of data. ( command from Ubuntu)
Request time out, ping from Windows
Thanks in advance.
Hi Matteo,
Sorry for the delay in replying. Life has been very busy lately 🙂
It sounds like for some reason the tunnel isn’t coming up, have you checked the config on both ends? And is the Firewall service running on the Windows machine?
Gyp
Hi, i just found this article and it was very informative. I am trying the same setup except that i have a windows server 2016 and an ubuntu server, and i am trying to use ikev2. After setting up all the parameters like you did, i ping from both machines and i get no replies. Monitoring with wireshark shows me only Ike_SA_Init or Identity_Protection (main mode) packets, but the tunnel does not come up.
Do you have any advice? Thank you.
Hi Teddy,
Sorry for the late response.
Is there anything else in between these machines or are they on a flat network?
Gyp
Hello Gyp, thanks for your response. The machines are on the same flat network, but i discovered the issue is that Windows does not support Ikev2 in this configuration with PSK authentication. It’s considered outdated,insecure and is not supported. I am trying to recreate your setup now but with certificate authentication to take advantage of IKEv2. Do you have any tips for that? Thanks 🙂
Hi Teddy,
Sounds like a fun project 🙂
I wrote about how to set up a certificate based IPSec connection a while ago if that may be of any use?
https://www.gypthecat.com/easyish-ipsec-vpn-with-shared-ecdsa-certificates-for-host-to-host-connections
Quite a bit more complicated to setup, and you’ll need to get the certificate imported onto the Windows machine in the right format, but should be more than possible 🙂
Gyp
Hello and thank you for your response. I saw that article and tried to implement some of it. The thing is i need the vpn to be between WS 2016 and Ubuntu. I cannot seem to make them only authenticate with certificates, Windows keeps trying a second phase of authentication with EAP-MSCHAP (username+pass). Is there any way to avoid that? Only auth with certificates and thats it?
Hi Teddy, it sounds like it may be an optional crypto? You may need to have a look at this screen and see if you can mark it as optional and list the certs only?