
Installing LEMP on Ubuntu 14.04 with Nginx and NAXSI
Well, after my last tutorial about getting a LEMP server on Ubuntu 11.10 I’m very happy to announce that the process is now a heck of a lot easier on 14.04! As a matter of fact you don’t need to create your own startup scripts for the services anymore which is nice.
So in light of the massive changes we’ve seen on 14.04 here is my guide in getting a LEMP server running on your Ubuntu box. However, we’ll be doing something a little different by including NAXSI in our stack. If you don’t know NAXSI is a very capable and beautiful web application firewall (WAF), for me it’s another great reason why open source is so amazing.
This tutorial won’t go into any additional hardening steps, but I will cover off a NAXSI and hardening of Nginx config tutorial in another post soon.
In this tutorial we will be installing:
- Nginx – Web server
- NAXSI – Web application firewall
- PHP – Lots of PHP processing which we need with many applications
- MySQL – The database server
So why MySQL and not MariaSQL? Well although I completely respect what the guys over at MariaSQL are doing, and would love to have included it in this tutorial I still find the odd little problem with their application. I’m not a database guy by any stretch so don’t take my word for it, but for a production server I’m still leaning on the side of Oracles’ MySQL. Hopefully by Ubuntu 16.04 I will be writing this for MariaDB!
So lets start by installing our database backend.
apt-get install mysql-server mysql-clientAccept the prompt by pressing Y
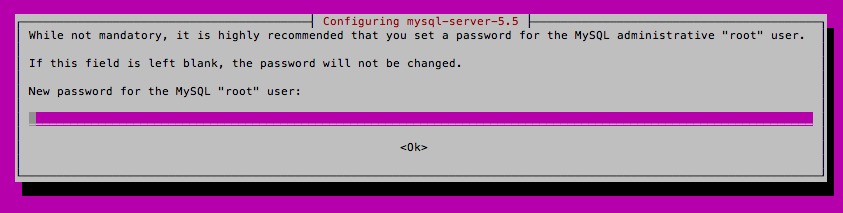
Give yourself a decent SQL root password and confirm it again on the next screen.
Now lets install all those lovely PHP goodies
apt-get install php5-cgi php5-cli php5-mysql php5-curl php5-gd php5-idn php-pear php5-imagick php5-mcrypt php5-memcache php5-intl php5-pspell php5-recode php5-sqlite php5-tidy php5-xmlrpc php5-xsl php5-gd php5-common php5-fpmIt will have to download and install a fair chunk of software, but that’s ok, so press Y and say you want to continue.
Now we will install the Nginx web server and the NAXSI WAF in one fantastically convenient package
apt-get install nginx-naxsiPress Y as usual to say that you want to install it
Next we shall put on the necessary bits which will let us server secure files over HTTPS
apt-get install libpcre3-dev libssl-devAfter we’ve got all the applications we now need to setup the necessary config files, lets make sure NAXSI is included on our config
nano /etc/nginx/nginx.confunder basic settings make sure the NAXSI rule isn’t commented out, it should look like this;
include /etc/nginx/naxsi_core.rules;CTRL+O and CTRL+X to save and exist respectively.
Now lets make sure our PHP is working by turning on PHP on our default site and passing PHP accordingly:
nano /etc/nginx/sites-enabled/defaultYou are looking for the section which looks like this:
# pass the PHP scripts to FastCGI server listening on 127.0.0.1:9000
#
#location ~ \.php$ {
#       fastcgi_split_path_info ^(.+\.php)(/.+)$;
#       # NOTE: You should have "cgi.fix_pathinfo = 0;" in php.ini
#
#       # With php5-cgi alone:
#       fastcgi_pass 127.0.0.1:9000;
#       # With php5-fpm:
#       fastcgi_pass unix:/var/run/php5-fpm.sock;
#       fastcgi_index index.php;
#       include fastcgi_params;
#}
We want to comment it out like this:
# pass the PHP scripts to FastCGI server listening on 127.0.0.1:9000
#
location ~ \.php$ {
fastcgi_split_path_info ^(.+\.php)(/.+)$;
#       # NOTE: You should have "cgi.fix_pathinfo = 0;" in php.ini
#
#       # With php5-cgi alone:
#       fastcgi_pass 127.0.0.1:9000;
#       # With php5-fpm:
        fastcgi_pass unix:/var/run/php5-fpm.sock;
        fastcgi_index index.php;
        include fastcgi_params;
        }
CTRL+O and CTRL+X to save and exit again.
Now lets create a file which will let us test our php, type the following to create a PHP info file:
echo '<?php phpinfo(); ?> ' >> /usr/share/nginx/html/php.phpLets make sure our Nginx config looks like it should:
nginx -tHopefully you should get something like the following:
nginx: the configuration file /etc/nginx/nginx.conf syntax is ok
nginx: configuration file /etc/nginx/nginx.conf test is successful
Which is good, so lets restart Nginx for all our changes:
service nginx restartNow if you open up the link below in your favourite browser:
http://[your IP address here]You should be looking at a page like this:
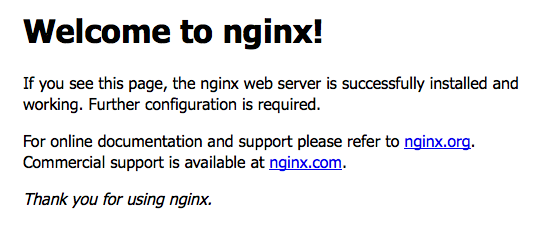
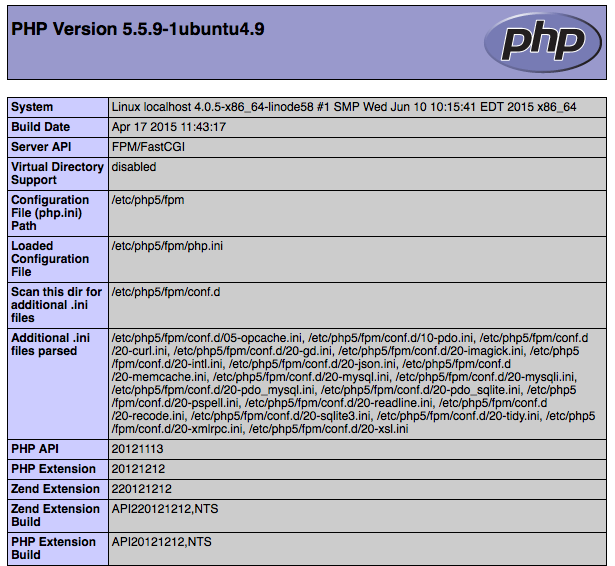
This shows us that our web server is running how it should, now lets test our PHP, type in your browser:
http://[your IP address here]/php.infoYou should get a bit long page which looks like the following, as long as you get it then we know PHP is working:
Give the server a reboot because why the heck not:
shutdown -r nowAwesome! You should give yourself a clap on the back, you’ve got a working LEMP server!
Any questions or queries please leave a comment? Anything I could do better? Please leave a comment I’m keen to learn!


2 Comments
Thanks for the useful article!
slight continuity issue with these steps..
echo ‘ ‘ >> /usr/share/nginx/html/php.php
http://[your IP address here]/php.info
maybe make them
echo ‘ ‘ >> /usr/share/nginx/html/info.php
http://[your IP address here]/info.php
Hey, tell more about naxsi in next post, i am waiting!